Table of Contents
Download and Install Java for Selenium WebDriver
This tutorial guides you through the step by step process of downloading and installing Java in your machine. To start working on Selenium automation tests for web applications, you need to get the language binding using which you can write your test scripts. For using Java as the programming language, the first step is to download and Install Java in your machine. Once Java is installed, then the next steps are to install Eclipse IDE and download Selenium Webdriver libraries.
JDK and JRE
Before we jump into Java installation, let us discuss some key points here. Java is an object-oriented computer programming language which is used to develop software, web, Android and scientific applications. Apart from developing applications, at times the Java environment is required to run various applications on your machine which are developed in Java.
Hence, Java is available as two components which you can install. Each one of them has a specific usage. It is important to understand their purpose before we go ahead with the installation. The two components are
- Java Runtime Environment (JRE): JRE provides with a runtime environment to execute a Java application in your system. It comes as part of JDK as well. It equips you with minimum environment setup using which you can run Java programs. The JRE internally consists of the Java Virtual Machine (also called JVM), Java platform core classes, and supporting Java platform libraries. JVM basically stands for Java virtual machine which helps to execute Java programs on hardware.
- Java Development Kit (JDK): JDK is a complete software development kit to develop Java applications. When you install JDK, JRE is installed as a part of it. But JRE installation does not include JDK. JDK is a superset of JRE plus tools such as the compilers and debuggers necessary for developing applications.
The diagram shown below summarizes our discussion about JDK and JRE.

Hence, for writing Selenium automation code, you need to download JDK not just JRE. Let us get started with the first process of Java download.
Downloading Java
- Go to google home page and search for Java JDK download. Click on Java SE Development Kit 8.
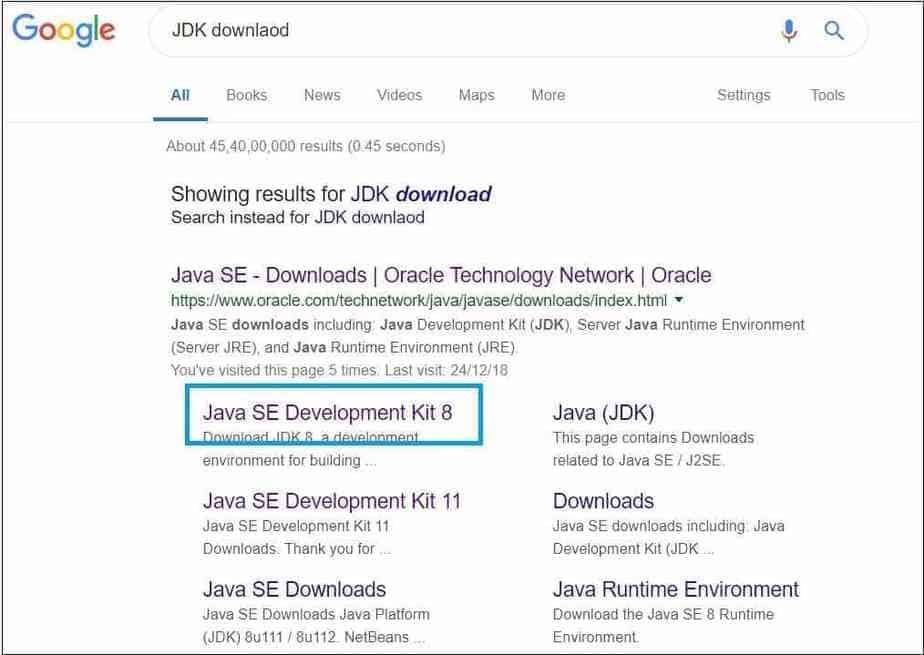
Note: We are downloading Java 8 because selenium and mobile automation frameworks are stable with this version of Java. You can go ahead and download any latest version of java depending on the requirement of your project. The process of download and installation remains the same as described in this tutorial irrespective of the version of java you are working with.
Instead of going from google, you can also directly go to the official website of Oracle to download Java. The link to download java is given below.
https://www.oracle.com/technetwork/java/javase/downloads/index-jsp-138363.html

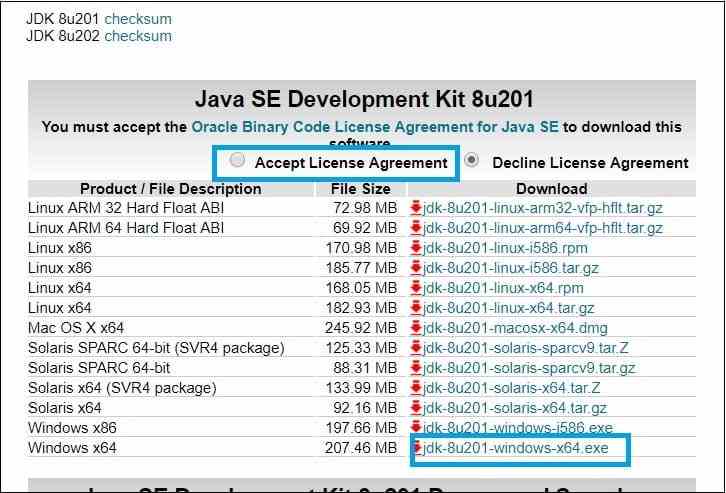
2. You will be navigated to the official site of Oracle for JDK download. Click on Accept License Agreement radio button which is a pre-requisite to start the download. Click on the exe to download the Java executable as per the configuration of your system. This executable file is used to run the java installation procedure.
Note: If you have a 32-bit windows system, then download exe corresponding to Windows x86. If you have 64-bit windows, then download the exe for Windows x64.
3. Download and save the exe file in your system. You can save it in any folder of your choice. The download can take a while depending on the speed of the internet. This exe file will be used to install Java.

This completes the process of Java download. Let us now start with the next step which is Java installation.
Installing Java
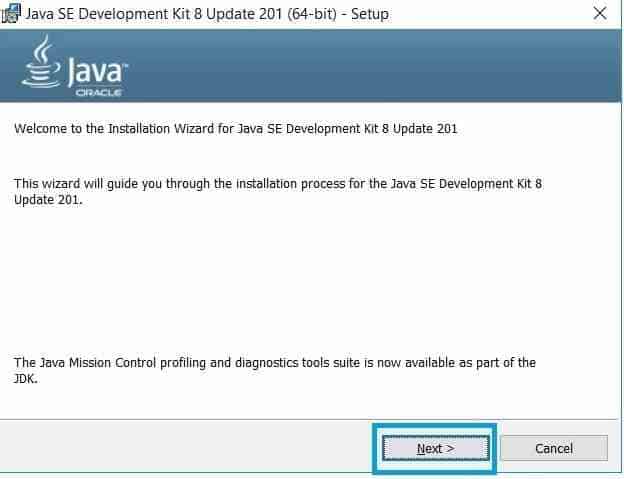
1. Once the download is completed, double click the exe file to start the installation of JDK. Click on next button when prompted.
2. The window shown below will pop up which will ask you to select the optimal features which you want to install. Click on next. It will run the installation script after this.

3. Once the installation is finished, the dialog box with the success message will be displayed. This shows Java is successfully installed in your machine.
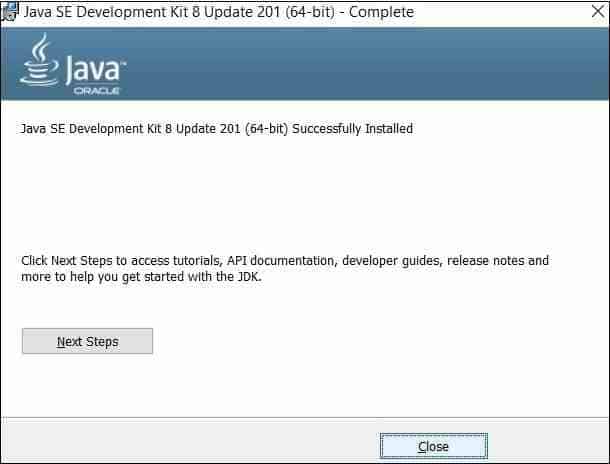
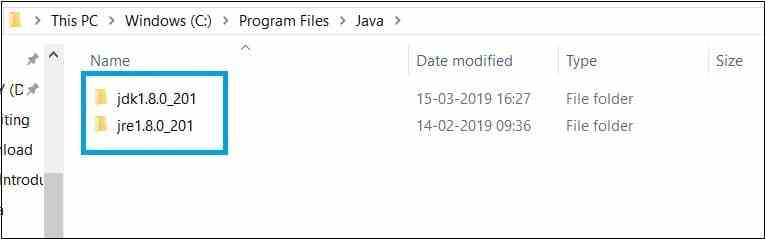
This completes the installation of Java. Once it is finished, a folder with name Java will be created in C://Program Files. As you can see, it contains both JDK and JRE folders.
Bingo, now java is available in your system!
Java environment variables setup
So, what is the next thing you can do with JDK? Can you directly start using it for your automation script development? How will the external software systems find JDK location in your machine? The answer to these questions forms the next step after you are done with Java installation.
After the installation is completed, system environment variables need to be set. These environment variables tell the location of the JDK and java binaries folders in your machine to the external programs and tools which require Java to run. These programs access environment variables to reach the location of Java in the system. The two Java environment variables which are required to be set are
- JAVA_HOME: It points to the location of JDK in your system
- Path: It points to the location of the bin folder lying inside the JDK folder in your system.
If multiple versions of Java are installed on your machine, then by declaring Java environment variables, you can point to the folder location of the version of Java you want to be used.
Below are the stepwise instructions to guide you to set up these Java environment variables in your machine.
Set UP JAVA_HOME environment variable
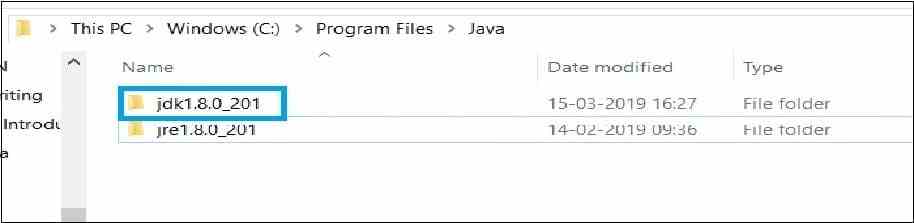
JAVA_HOME environment variable points to the location of JDK in the machine. To set up JAVA_HOME, go to C:\Program Files\Java\jdk1.8.0_201. This is the folder which contains binaries, libraries and other tools required to develop Java applications. The location of this folder forms the value of the JAVA_HOME environment variable.
JAVA_HOME = C:\Program Files\Java\jdk1.8.0_201
Note: There can be multiple versions of JDK present inside the Java folder depending on the versions installed on the machine. In that case, you need to select the JDK folder of the Java version, which you want to use. I want to use JDK1.8.0_201, so I have copied its path to set up my JAVA_HOME variable.
- Go to Control Panel > System and Security > System and click on advanced system settings on the lefthand side of the screen. This will open up the setup window for System Properties.

2. The system settings window will be displayed as shown. It will automatically open the window in the advanced tab. At the bottom right of the window, click the button for environment variables.

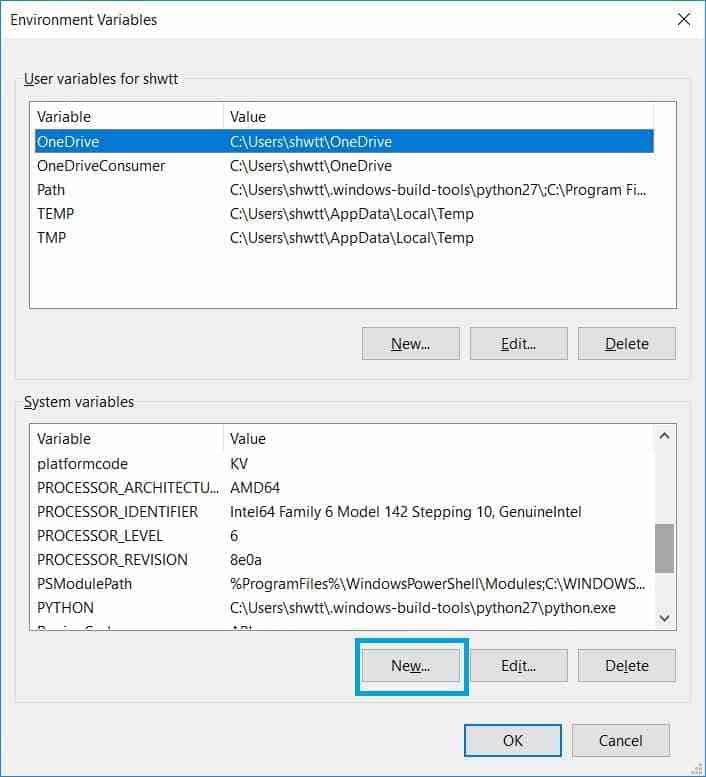
3. When you click on environment variables button, below set up window will pop up. From here you can create and edit environment variables for your machine. For creating JAVA_HOME, click on the new button.
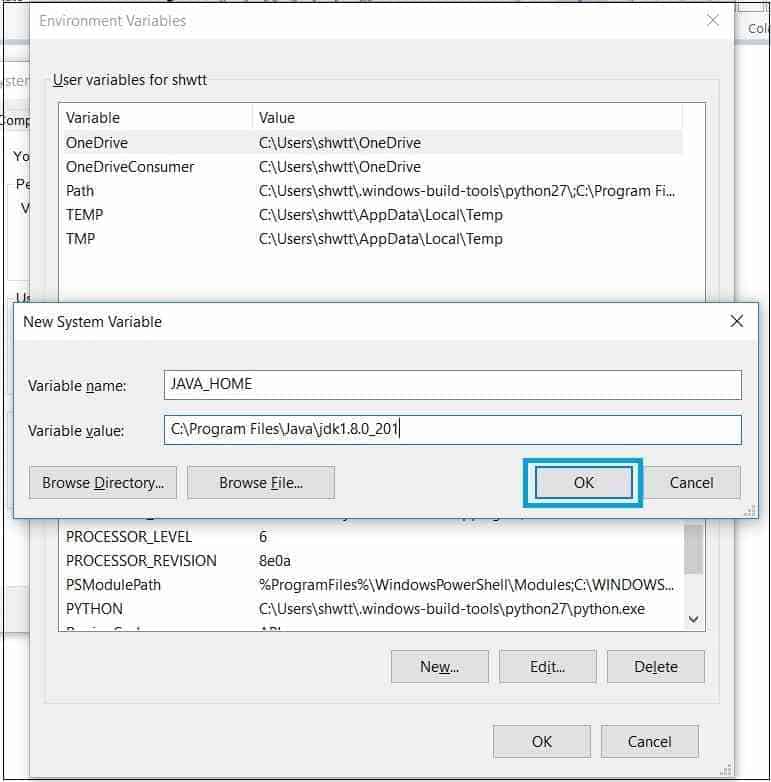
4. On the New System Variable window, enter JAVA_HOME in Variable name. Enter the Variable value as C:\Program Files\Java\jdk1.8.0_201 and click on OK.
5. The above steps will create an entry for the JAVA_HOME environment variable in the list of system variables as shown below.

Set up Path environment variable
The Path environment variable points to the binary files of installed software packages. If any external software system needs to access these binary files, it will reach to them using the Path system variable. The path variable has many entries. Mostly, it will be already present in the list of your system variables. You only add an entry for your binary file location in the already present Path variable. For adding the entry for Java, go to C:\Program Files\Java\jdk1.8.0_201\bin and copy this file path of bin folder in your machine.
Path = C:\Program Files\Java\jdk1.8.0_201\bin
As Java_Home variable is C:\Program Files\Java\jdk1.8.0_201, we can also say
Path = %JAVA_HOME%\bin

- Goto environment variable setup window again and select Path from the list of system variables.

2. On the Edit environment variable screen, click on new and enter the path to the bin folder inside JDK which is C:\Program Files\Java\jdk1.8.0_201\bin. Once done click on OK button which will add an entry for Java bin folder in your systems path variable.
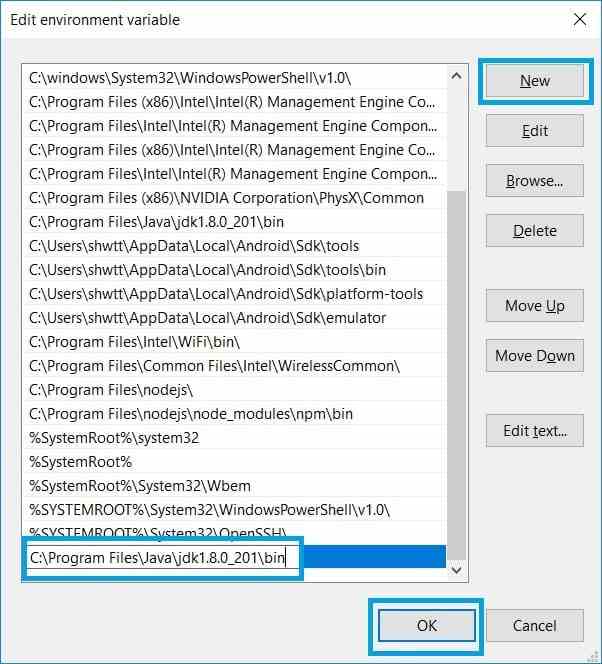
3. You can see the value you entered for Java bin folder has been added. Click on OK and you can come out of the system variables setup window. This completes the steps for environment variable setup.

Now that you are done with all the steps for java downloading, installation and environment variable setup, you need to check if Java has been installed successfully in your system. For that, go to command prompt and type javac -version command and press enter. It should give the correct version of JDK which you have installed in your machine.
 You can also type java command and press enter. The response to java command will be a list of options which can be used with java command to accomplish a particular task. But the most important of all it shows that Java has been successfully installed and is available for use now.
You can also check the value of environment variables from the command prompt using echo command.
echo %JAVA_HOME%

With this, you have successfully installed java in your system and you have set all the required environment variables.
Conclusion
In this tutorial, we have accomplished the below Java set up steps.
- Download Java from its official website.
- Install Java.
- Setup Java_home environment variable
- Setup Path environment variable
- Using command prompt, we have verified that Java has been successfully installed in the system.
Now we can use Java to develop our selenium automation test scripts. This process remains the same if we want to do develop or write java applications as well.